Opt-in Skin* comes with 18 really nice, super customizable opt-in forms, but sometimes you need something a little bit different than what they offer and that's where the custom design feature comes in.
Here's how to create a custom design in Opt-in Skin.
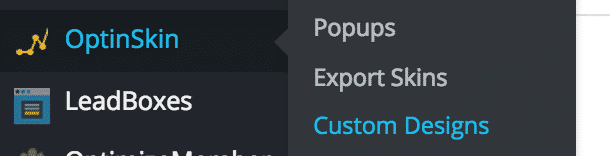
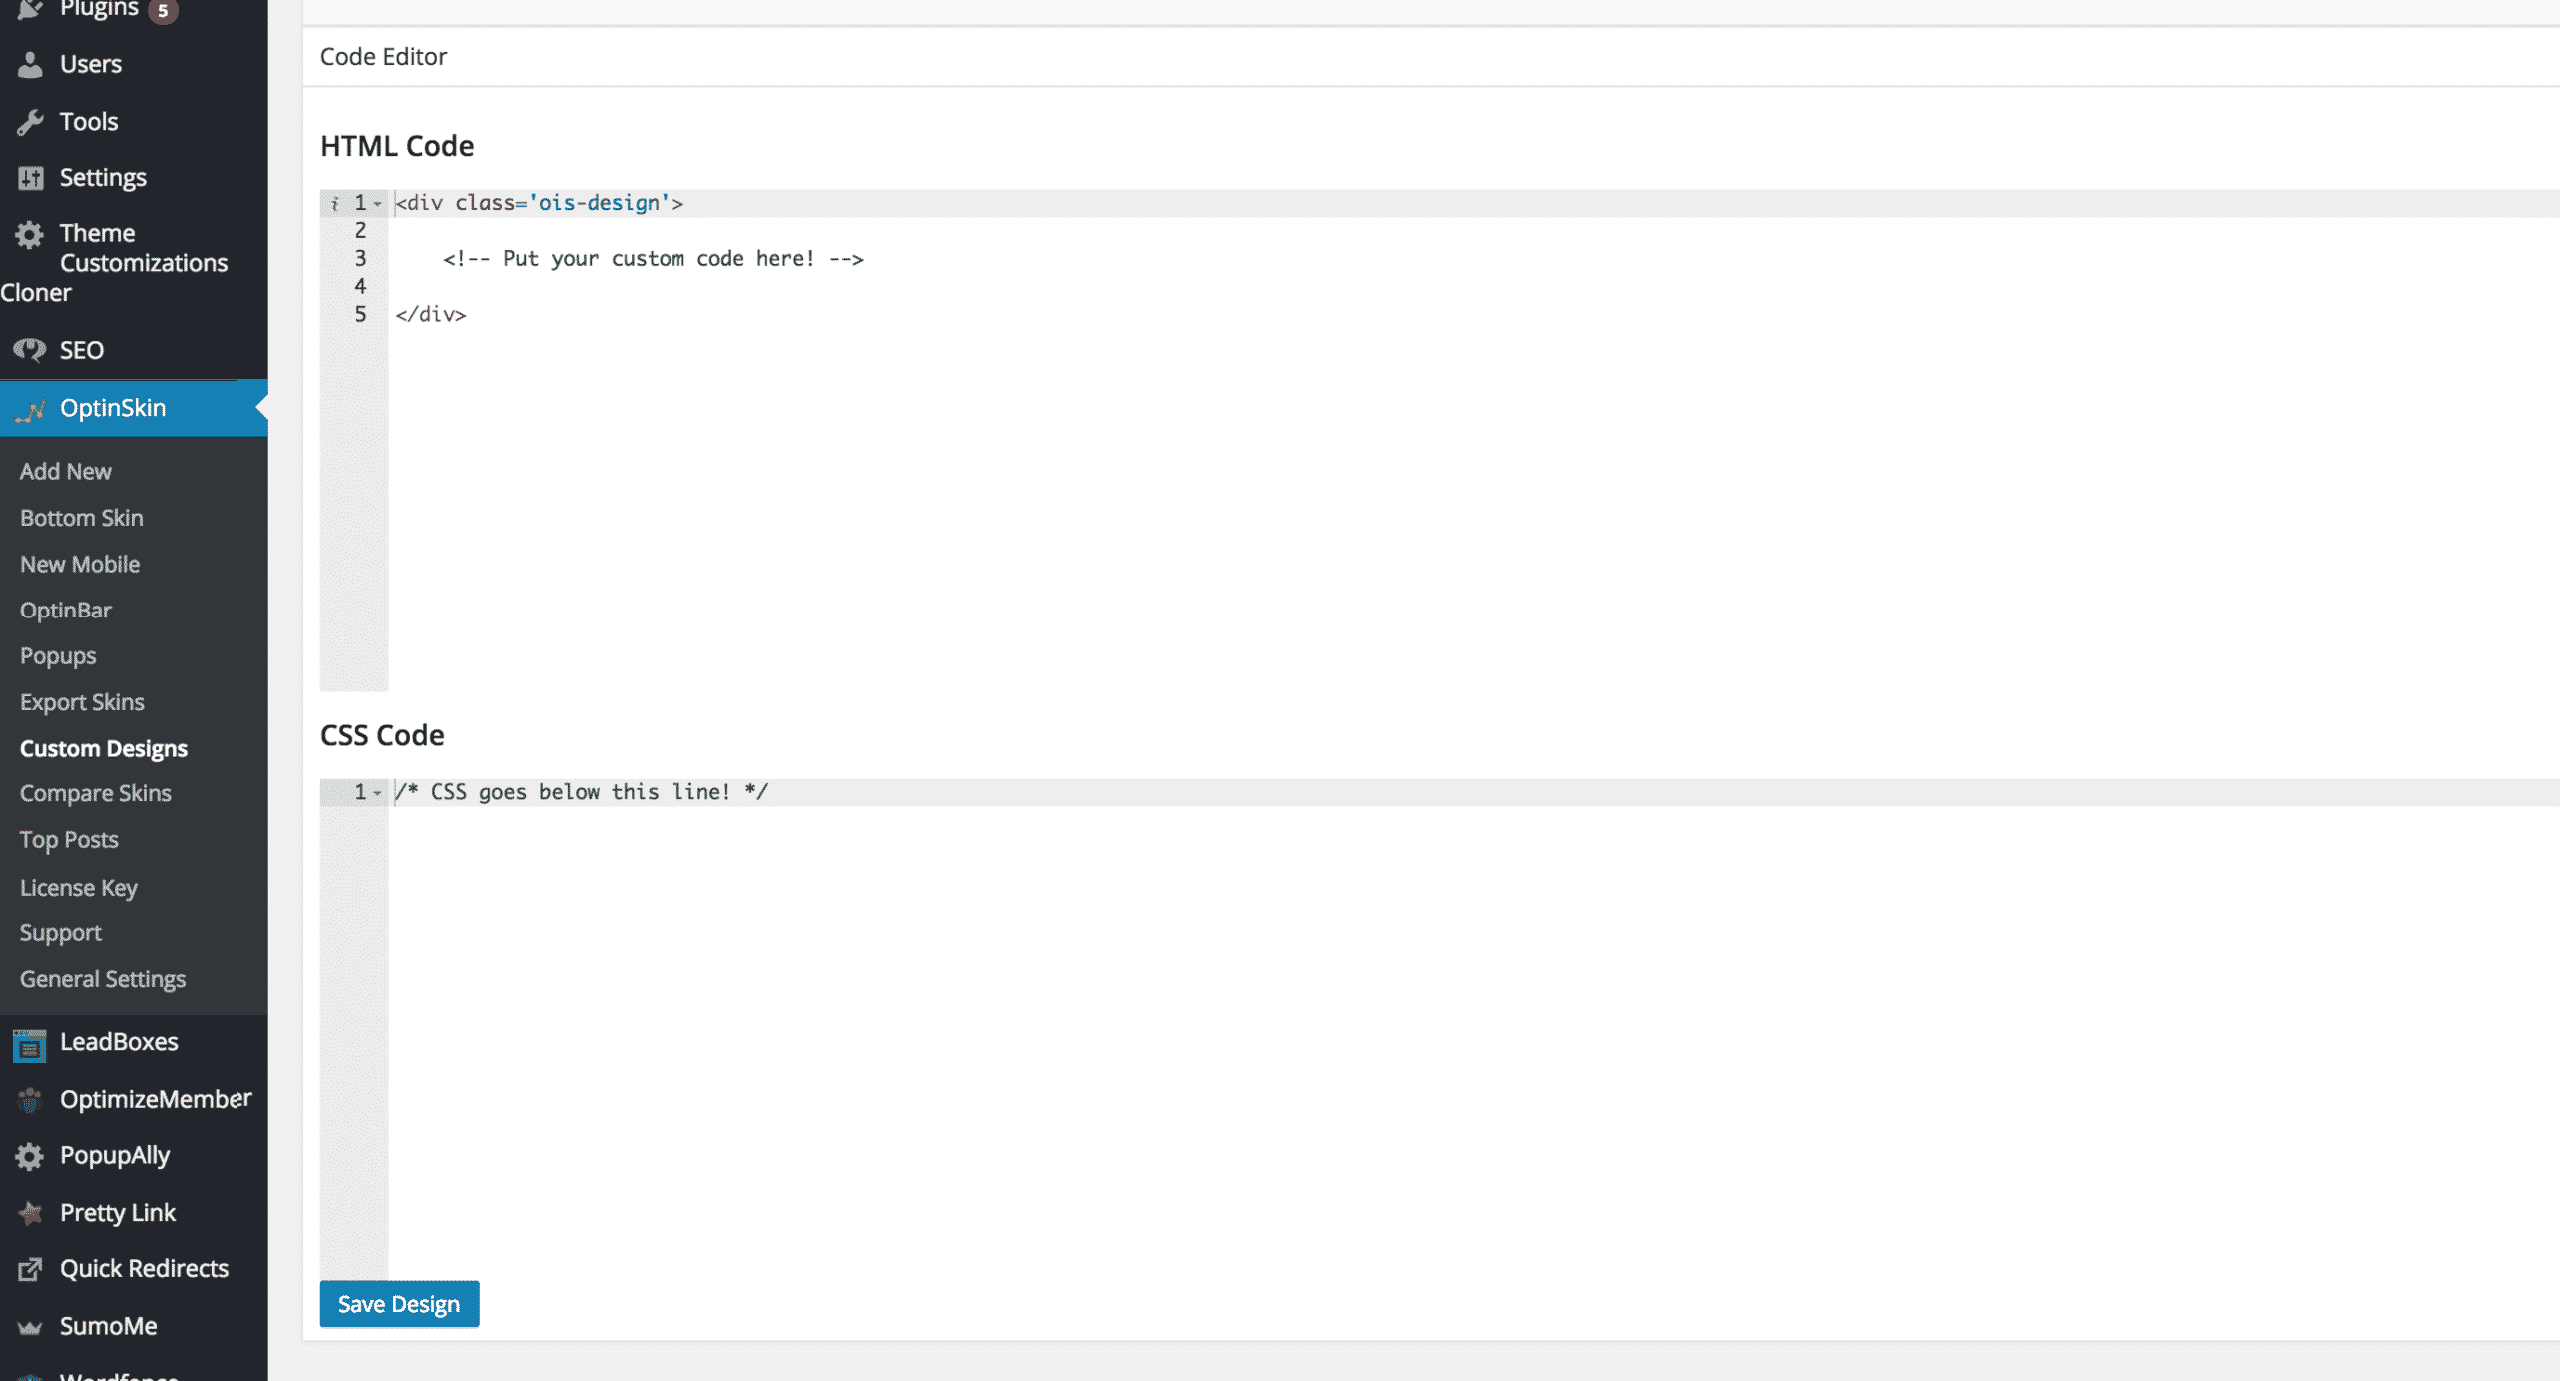
Click on Opt-in Skin > Custom Designs.
You'll see a big old blank page with a spot for HTML and a spot for CSS. Looks pretty intimidating BUT you know I'd never leave you hanging, right?
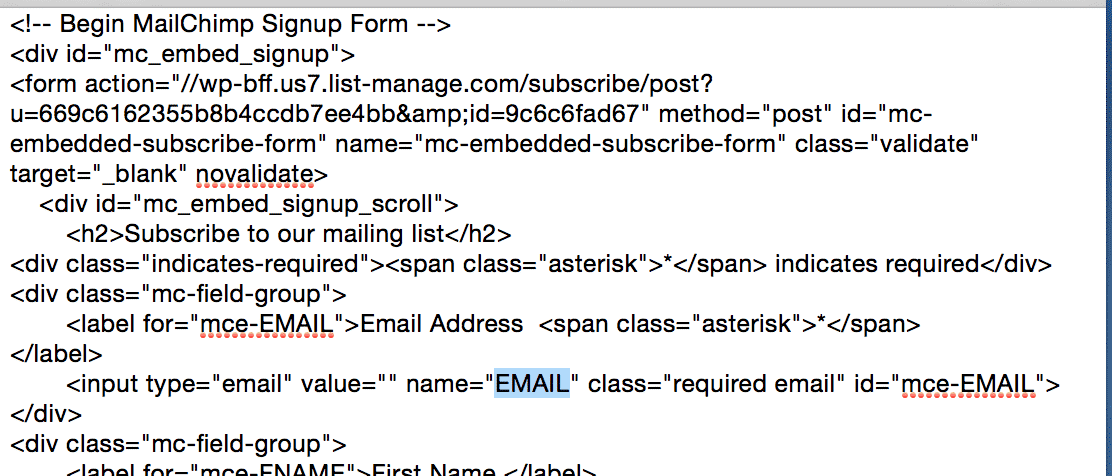
To get the codes you need to swap out, log into your Mailchimp account, click on Lists, click on your list, then click on Signup Forms > Embedded Forms and click on Naked.

Then in the section that says “copy and paste onto your site” you'll need the following codes which I've listed in the order they are in the code below (remember, yours will look different but they are in the same spot in the code:
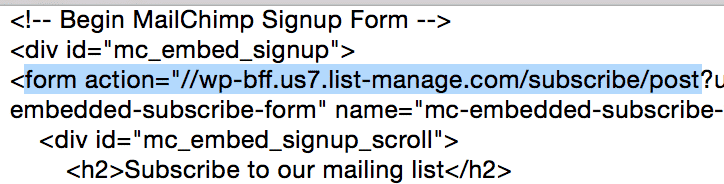
2) Mailchimp Account ID

3) List ID

4) Name Field (this might say name, it might say MERGE#, but look for <input type=”text”… and the value after that is the one you need).
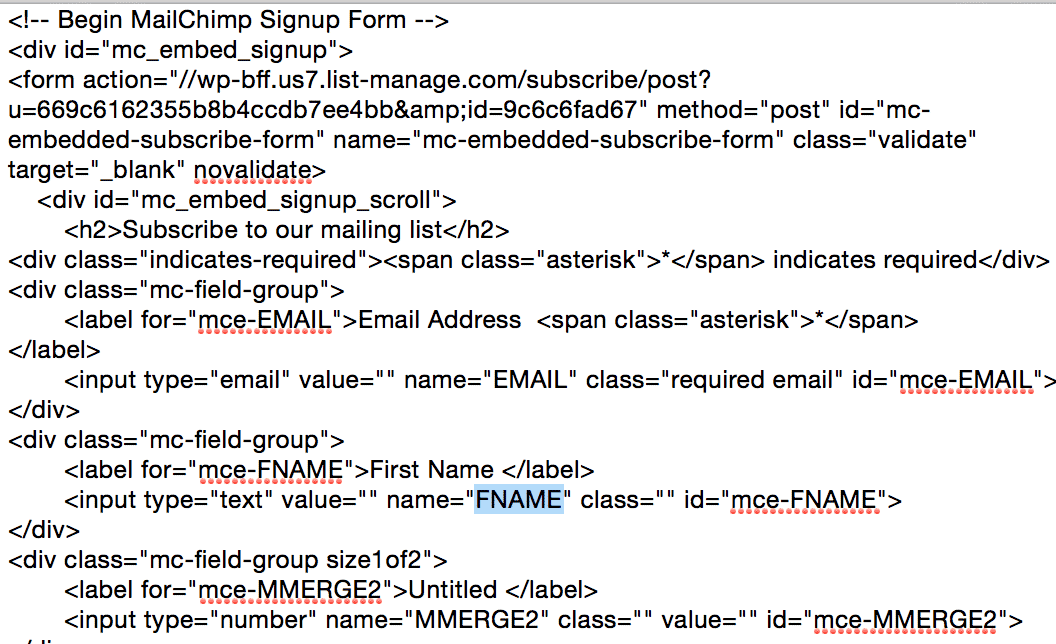
5) Email Field (this might say email, it might say MERGE#, but look for <input type=”email”… and the value after that is the one you need).
Here's the exact code I used to create my Opt-in Skin on the WP+BFF home page. You can copy and paste this code, and then I've highlighted what you need to change to connect it to own mailing list. Otherwise I'm gonna get all your subscribers!
This code goes in the HTML section with your info in the red sections:
<div class='ois-design'>
<div id='ois-4′ class='ois-design' ><div class=' visible-md visible-lg'><div class=”ois-outer ois-17-outer”>
<div class=”ois-17-inner ois-inner”>
<div class=”col-md-8″>
<div class=”ois-17-form”>
<form action=”http://wp-bff.us7.list-manage1.com/subscribe/post” method=”POST”>
<input type=”hidden” name=”u” value=”669c6162355b8b4ccdb7ee4bb“>
<input type=”hidden” name=”id” value=”9c6c6fad67“>
<input type=”text” name=”MERGE1” class=”ois-17-name-input ois-form-control ois-name-input” placeholder=”Your Name”>
<input type=”text” name=”MERGE0” class=”ois-17-email-input ois-form-control ois-email-input” placeholder=”Your Email Address”>
<input type=”submit” class=”ois-btn ois-17-button” value=”GIMME FREE ACCESS“>
</form>
</div>
</div>
<div class=”clearfix”></div>
</div>
</div></div></div>
</div>
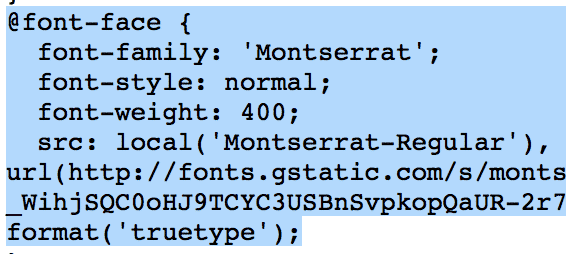
This goes in the CSS section – and you can swap out fonts and colors to match your brand.
And a quick tip to get all that code for your font – create a skin in Opt-in Skin with the font you want to use. Save it, then click on Export Skins (right above Custom Designs in the dashboard menu). You'll download a .zip file which you'll open up, find the CSS folder and there will be a file in there that's called style.css. Double click on it to open it, and then find the font code in it to swap out with my code below!
/* CSS goes below this line! */
/*
Stylesheet for OptinSkin; ID: 4.
Generated: August 4, 2015, 12:54 am
*/
/* From original stylesheet
at http://optinskin.com/src-4/design17/style.css */
.ois-17-header
{
border-bottom: 1px solid rgba(0,0,0,0.1);
}
.ois-17-email-input
{
height: 32px;
margin-right: 10px;
}
.ois-17-inner
{
border-style: solid;
}
.ois-17-button {
margin-left: 5px !important;
margin-bottom: 3px !important;
}
/* End original stylesheet */
/* Google Font stylesheets */
@font-face {
font-family: ‘Oswald';
font-style: normal;
font-weight: 400;
src: local(‘Oswald Regular'), local(‘Oswald-Regular'), url(https://fonts.gstatic.com/s/oswald/v10/Y_TKV6o8WovbUd3m_X9aAA.ttf) format(‘truetype');
}
/* End Google Fonts */
/* Generated from custom design options */
#ois-4 .ois-17-button, #ois-4 input[type='submit'].ois-17-button {
background-color: #b3d91c !important;
border-color: #b3d91c !important;
border-width: 0px !important;
font-size: 25px !important;
font-family: ‘Oswald', Helvetica, sans-serif !important;
height: 50px !important;
border-radius: 0px !important;
color: #ffffff !important;
font-weight: 700 !important;
width: 240px !important;
}
#ois-4 .ois-17-email-input {
padding-bottom: 5px !important;
padding-left: 5px !important;
padding-right: 2px !important;
padding-top: 6px !important;
text-align: left !important;
width: 245px !important;
border-radius: 0px !important;
margin-top: 0px !important;
margin-bottom: 0px !important;
}
#ois-4 .ois-17-name-input {
padding-bottom: 5px !important;
padding-left: 5px !important;
padding-right: 2px !important;
padding-top: 6px !important;
text-align: left !important;
width: 245px !important;
border-radius: 0px !important;
margin-top: 0px !important;
margin-bottom: 0px !important;
}
#ois-4 .ois-17-title {
text-align: left !important;
color: #2c3e50 !important;
font-size: 15px !important;
font-family: ‘Helvetica', Helvetica, sans-serif !important;
line-height: 21px !important;
font-weight: 700 !important;
margin-top: 5px !important;
margin-bottom: 10px !important;
}
#ois-4 .ois-17-inner {
border-color: #e3e3e3 !important;
border-width: 0px !important;
background-color: !important;
height: 99px !important;
border-radius: 4px !important;
padding-bottom: 10px !important;
padding-top: 10px !important;
padding-left: 10px !important;
padding-right: 10px !important;
}
#ois-4 .ois-17-outer {
width: 1400px !important;
margin-top: 0px;
margin-bottom: 0px;
margin-left: auto;
margin-right: auto;
}
#ois-4 .ois-17-form {
text-align: center !important;
}
/* End custom style */
/* End of file */
Final step – Click Save Design, then click on Add New to create a new skin, and your new design will be the last option in the available designs! It might not show up as a preview, but select it anyway, configure all the non-design options just like a pre-made skin (they won't be editable with a custom skin anyway), embed it on your site just like I show in Day 3 of the 5 Day Website Challenge and you're ready to TEST, TEST, TEST because you want to make sure you set up all your mailing list code correctly.
Lots of steps, but pretty easy once you get the hang of what you're doing! That's why I LOVE Opt-in Skin so much – you can make it blend in seamlessly with any website!
*I'm an affiliate for Optin Skin.