So you want to know how to move from SquareSpace to WordPress?
You're in the right place! Here's what this blog post covers:
- The exact steps to take to move from Squarespace to WordPress
- How to set up your web hosting* for just $2.95/month.
- Setting up WordPress (including settings, plugins & theme)
- Migrating your existing content from your SquareSpace site to WordPress, including pages, blog posts and images so that you don't lose any content!
- How to point your domain name from your old Squarespace site to your new WordPress site.
- How to redirect your old SquareSpace links to your new WordPress site.
Ready to move your SquareSpace site to WordPress?
Great! Let's get started!
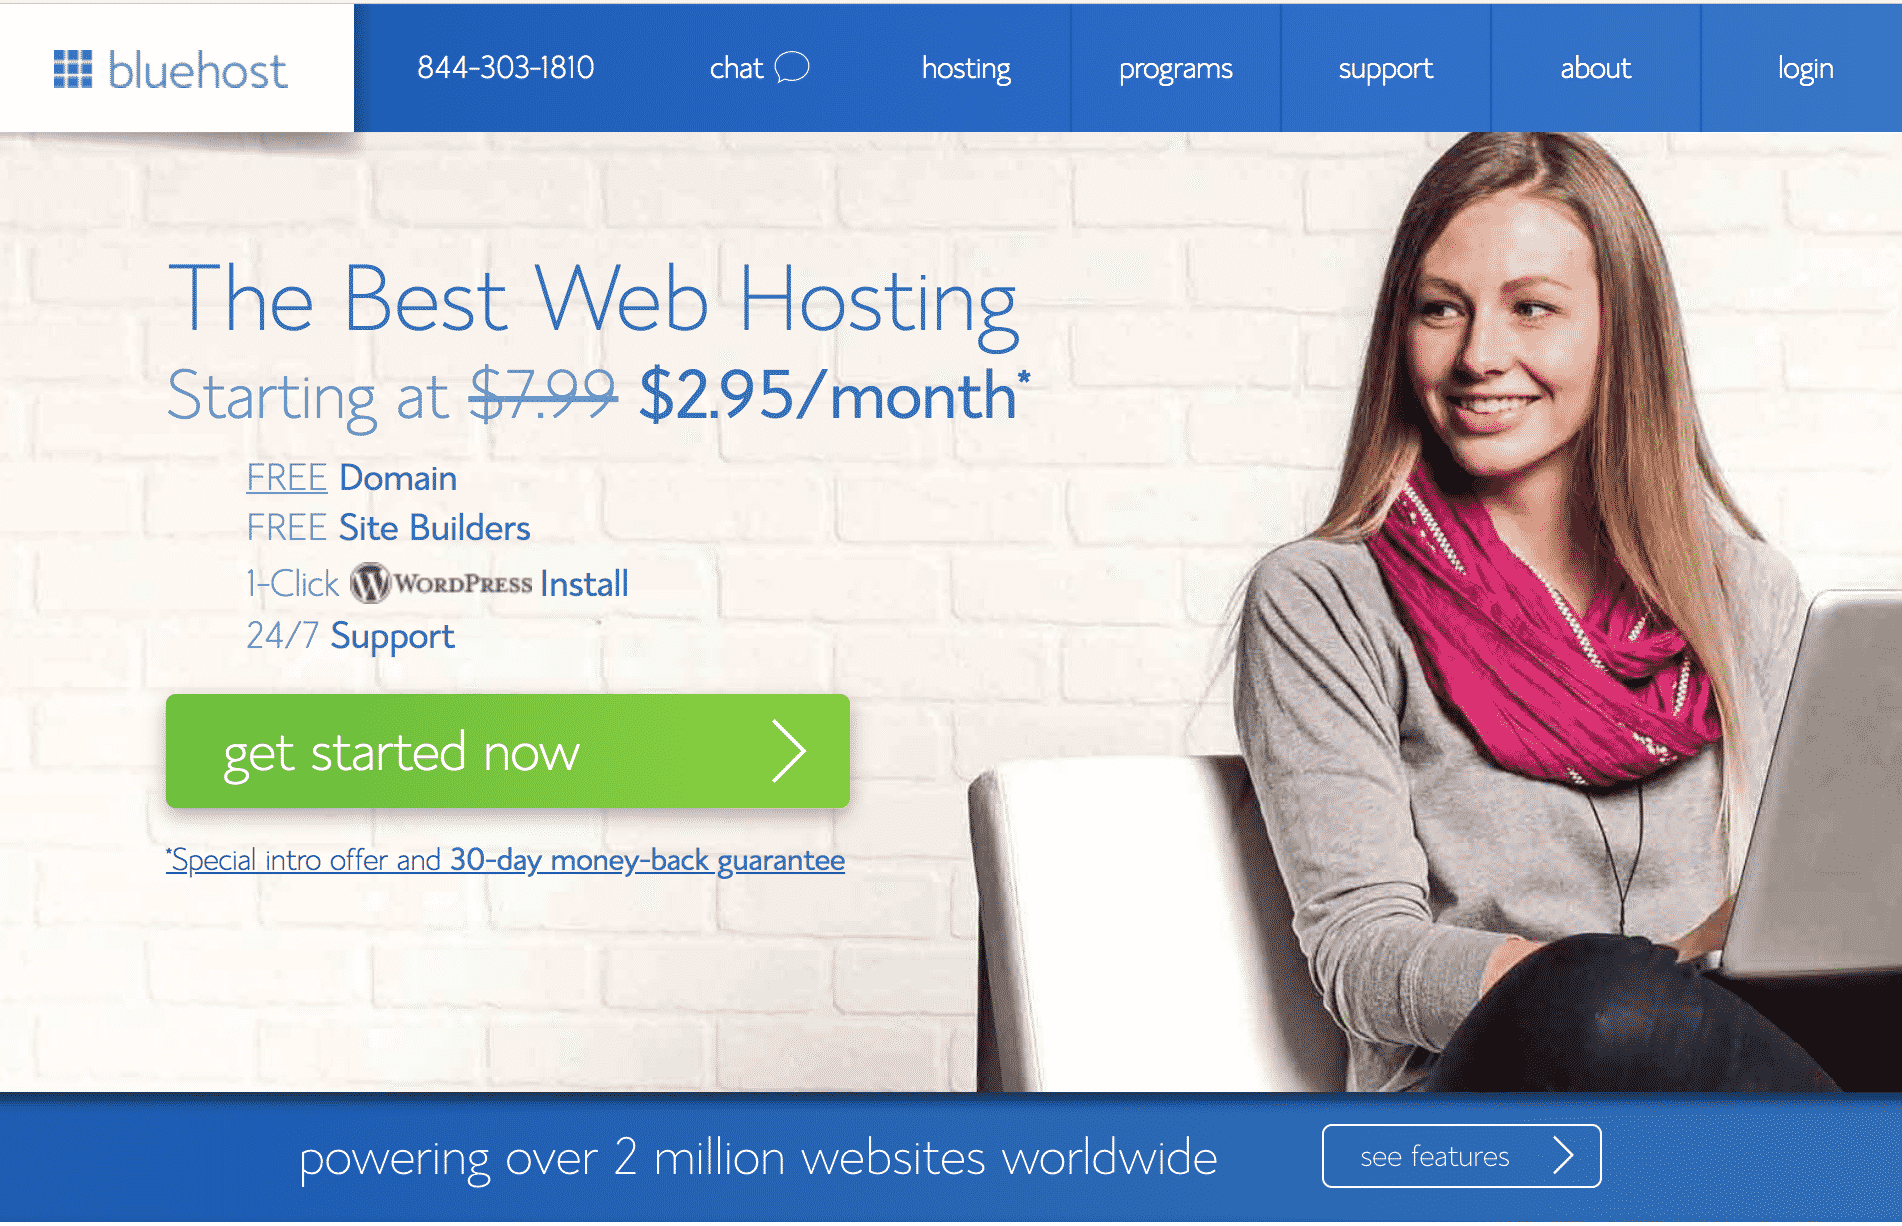
The first thing you need to do is set up hosting for your WordPress site. I use and recommend Bluehost* for a few reasons:
One, Bluehost* makes it super-easy to set up and manage your website.
Two, their price is amazing compared to other WordPress hosting companies. When you use my link* you'll pay just $2.95/month for your domain and hosting when you choose a 3-year renewal plan (that’s about $106), or if you’re not ready to commit to a full 3 years, you can buy just one year for $60.
Seriously??? That’s a sweet deal – and to top it off, they have a 30-day money back guarantee.
1. Set up your WordPress hosting with Bluehost*
Psst… if you want a video tutorial showing you step-by-step how to do this part, sign up for my Free 5 Day Website Challenge. More on that later.
And if you get stuck on any of these steps, just email me and I'll help you out!
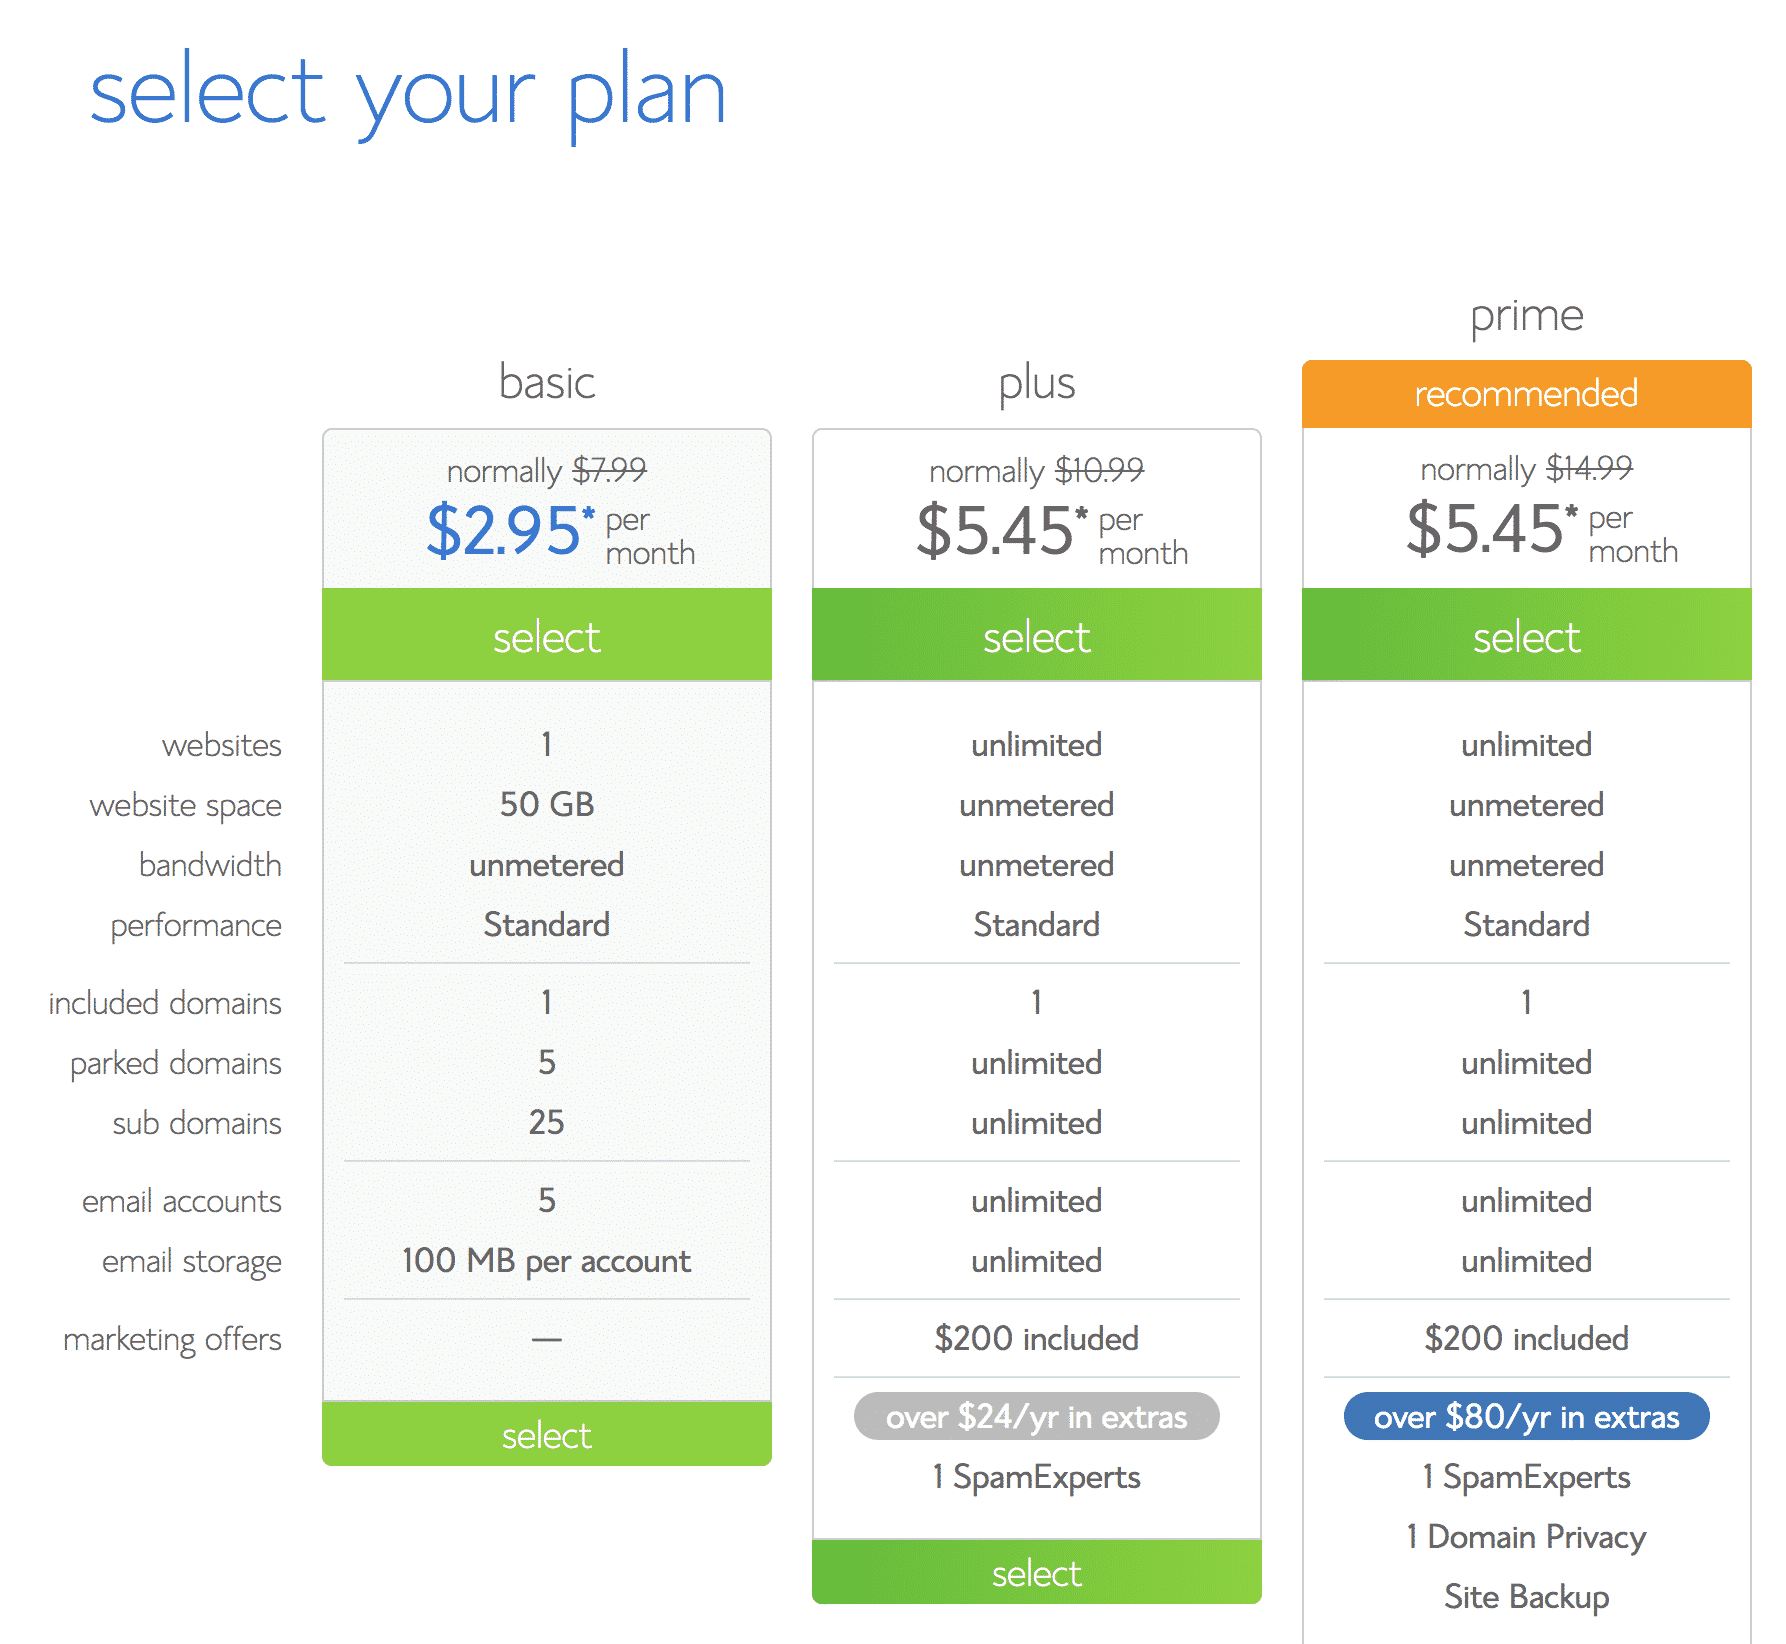
First, choose your plan.
- Go to www.wp-bff.com/bluehost and click on the green “Get Started Now” button.
2. Choose the BASIC plan (it's really all you need to get started, you can upgrade later as you grow)!
3. Enter your domain name. If you already have one that you bought from someone else, enter it on the right, otherwise, enter the one you want in the box on the left. It comes free with hosting (unless it's a premium name, which you'll find out on the next page).

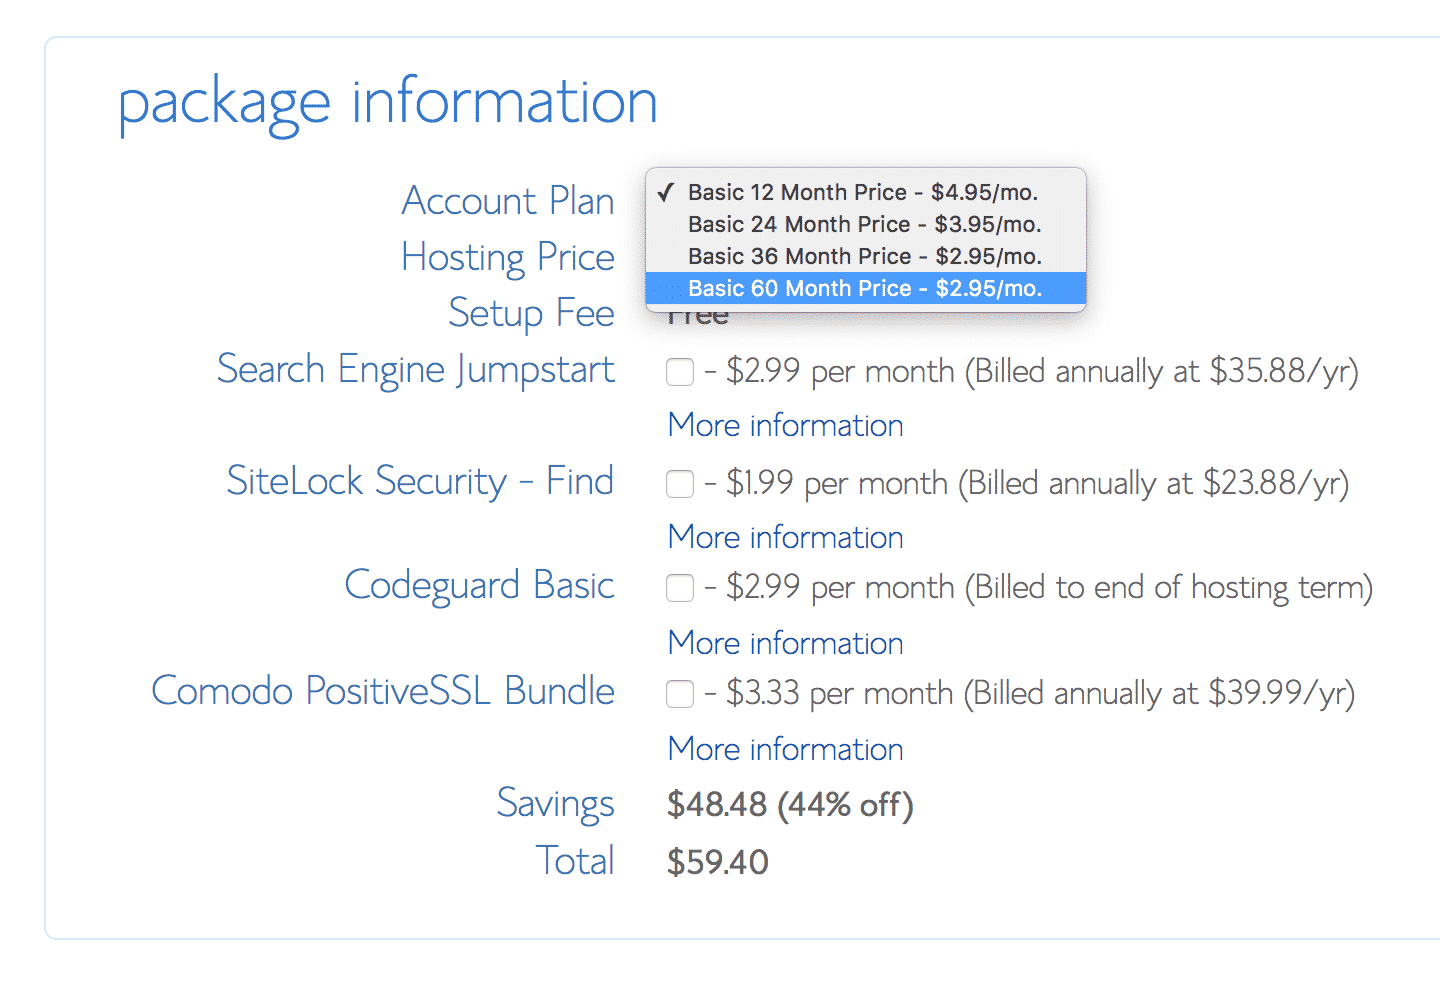
4. Enter your name and address info, then choose how long of a package you want and your options. The longer of a term you do, the more money you'll save over time. But if you're really on a shoestring budget you can change your term to 12 months and uncheck all the other options, and you'll end up with a total under $75 for your website.
If you don't get domain privacy protection, for the first few weeks after you buy your domain you're gonna get people calling you and emailing you about building your website for you. If that weirds you out, it might be worth it for you to buy the protection. I'm just like “New phone, who dis?”
After you pay, you'll be prompted to create a username and password for your account. It used to be that after that, you'd have to do a few things to install WordPress, but Bluehost* made this even easier
After you create your password WordPress will automatically begin installing on your account and voila'! Now you have a self-hosted WordPress website.
2. Build your WordPress site
I created a free step-by-step video training that's going to show you exactly how to set up your newly created WordPress site. I'll show you what theme to use, how to connect your email list, and how to apply the branding you chose for your SquareSpace site to your WordPress site.
Enter your name and email address below to get free access to the 5 Day Website Challenge.
Complete Days 1-4 of the 5 Day Website Challenge to build out your WordPress site, and before you start Day 5, you can move all of your Squarespace content over and then continue on with Day 5!
Once you get that foundation built, it's time to start moving your content from SquareSpace over to WordPress.
3. Move your SquareSpace pages and blogs to WordPress
There are two ways to get your content from Squarespace to WordPress.
If you have more than about 10 web pages and blog posts, I recommend exporting your content from SquareSpace and importing it into WordPress.
If you have less than 10 pages and posts, I recommend going the copy and paste route. I know, super technical right? But why spend more time trying to automate a manual process that you're only going to do once, amiright?
Export/Import Strategy
- Export your SquareSpace Site with these instructions. Note that not everything will export – see the list on the page. http://help.squarespace.com/guides/exporting-your-site
An XML file will be generated that you'll import into WordPress, so make a note of where you save this file!
A limitation of the export is that SquareSpace will only export your first page of blog posts. You can choose to recreate them all using Copy and Paste in WordPress, or you can export the first page of posts, make sure you can successfully import them into WordPress following the steps below, delete them in SquareSpace so that your first page shows the next set of blog posts, do the export/import again, and repeat until you have them all moved over.
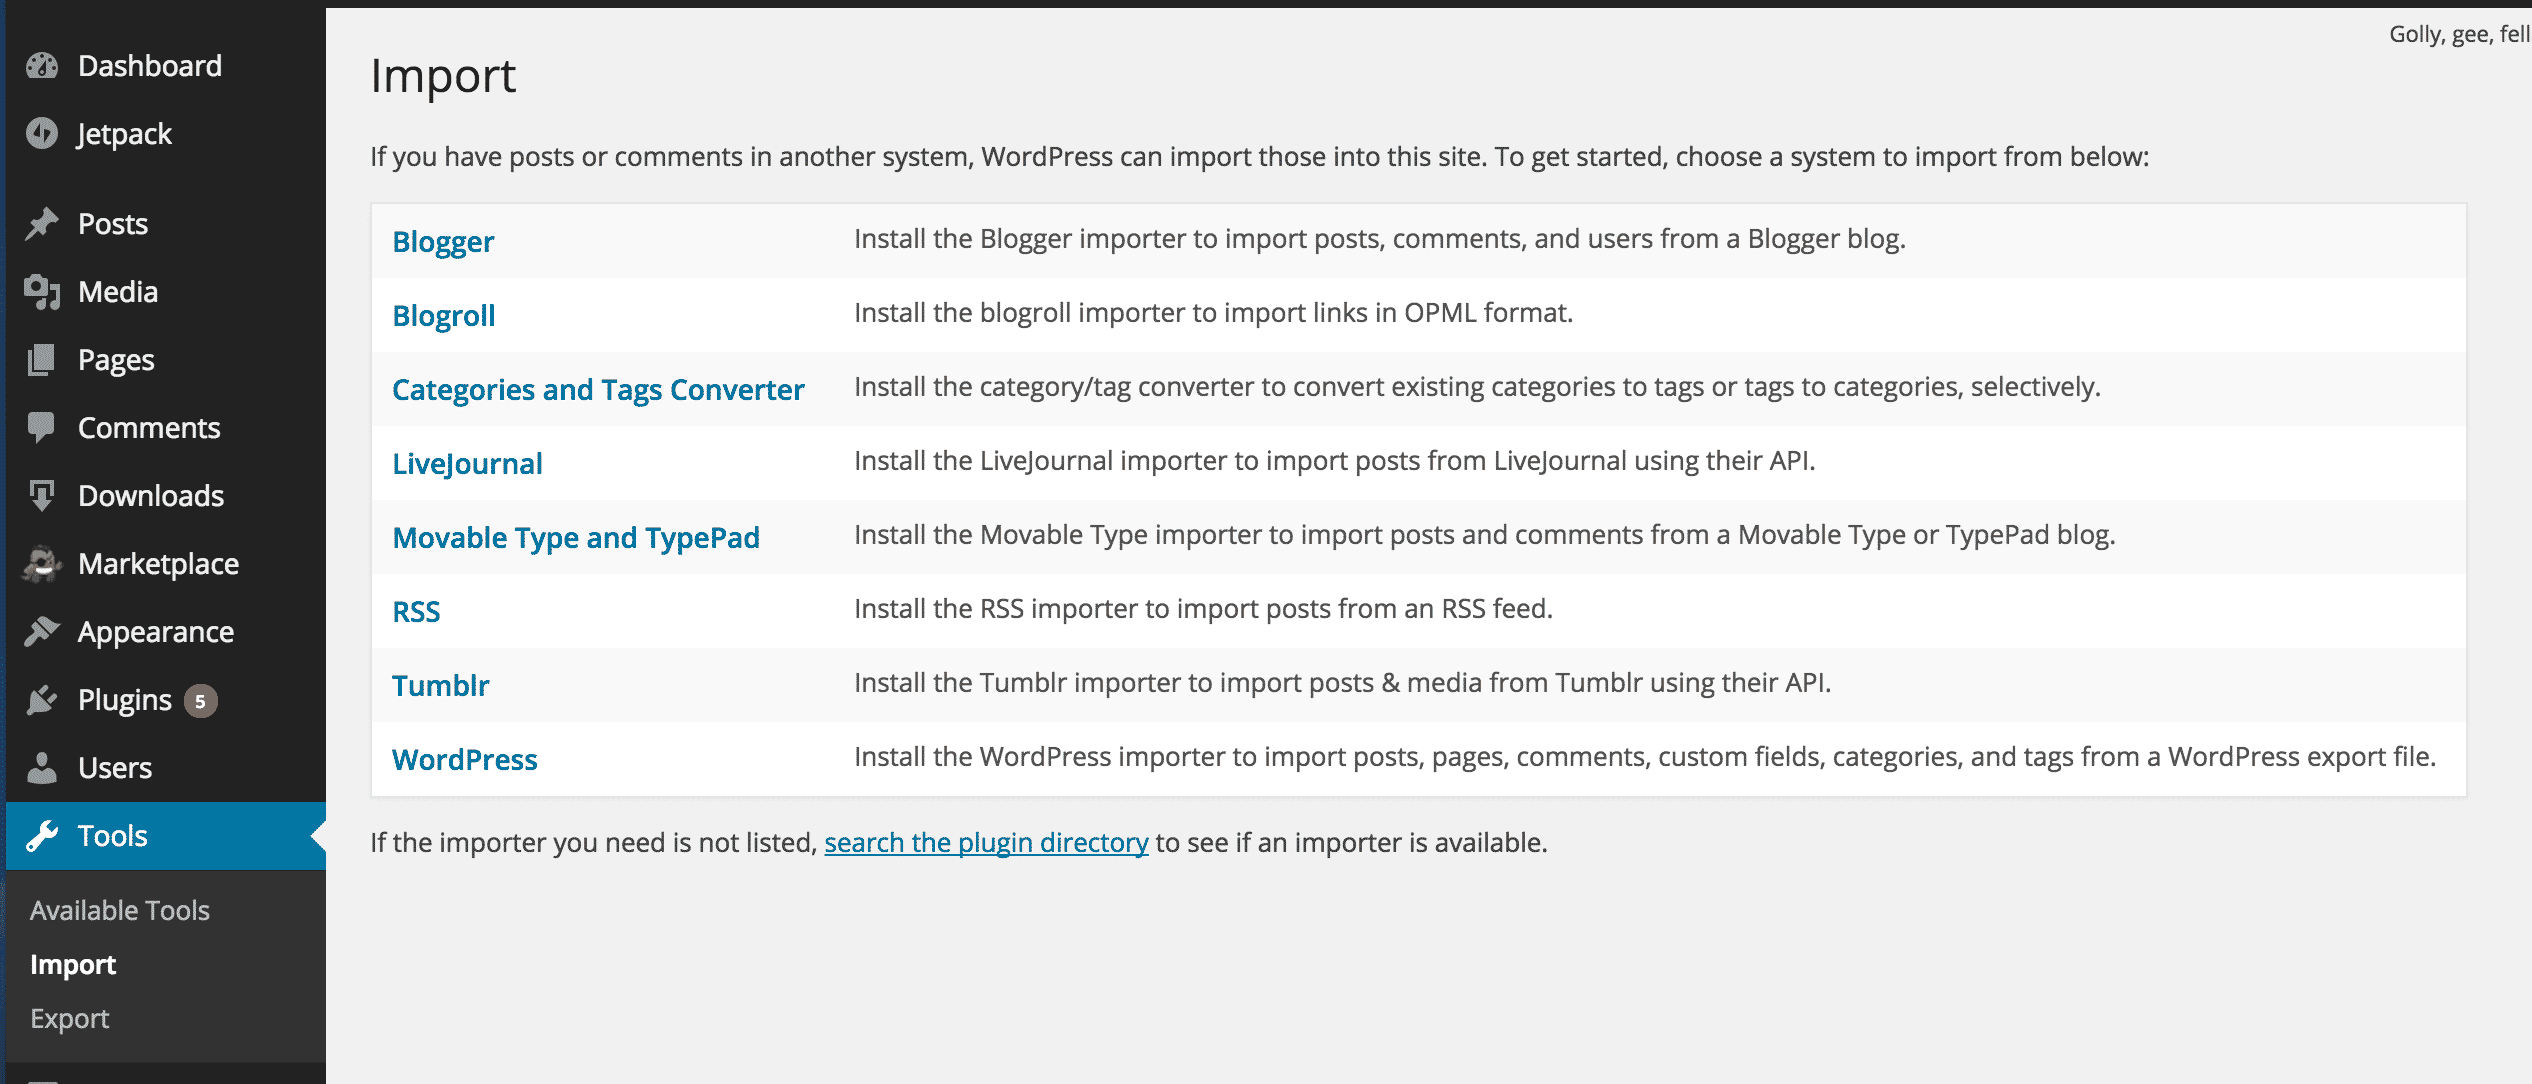
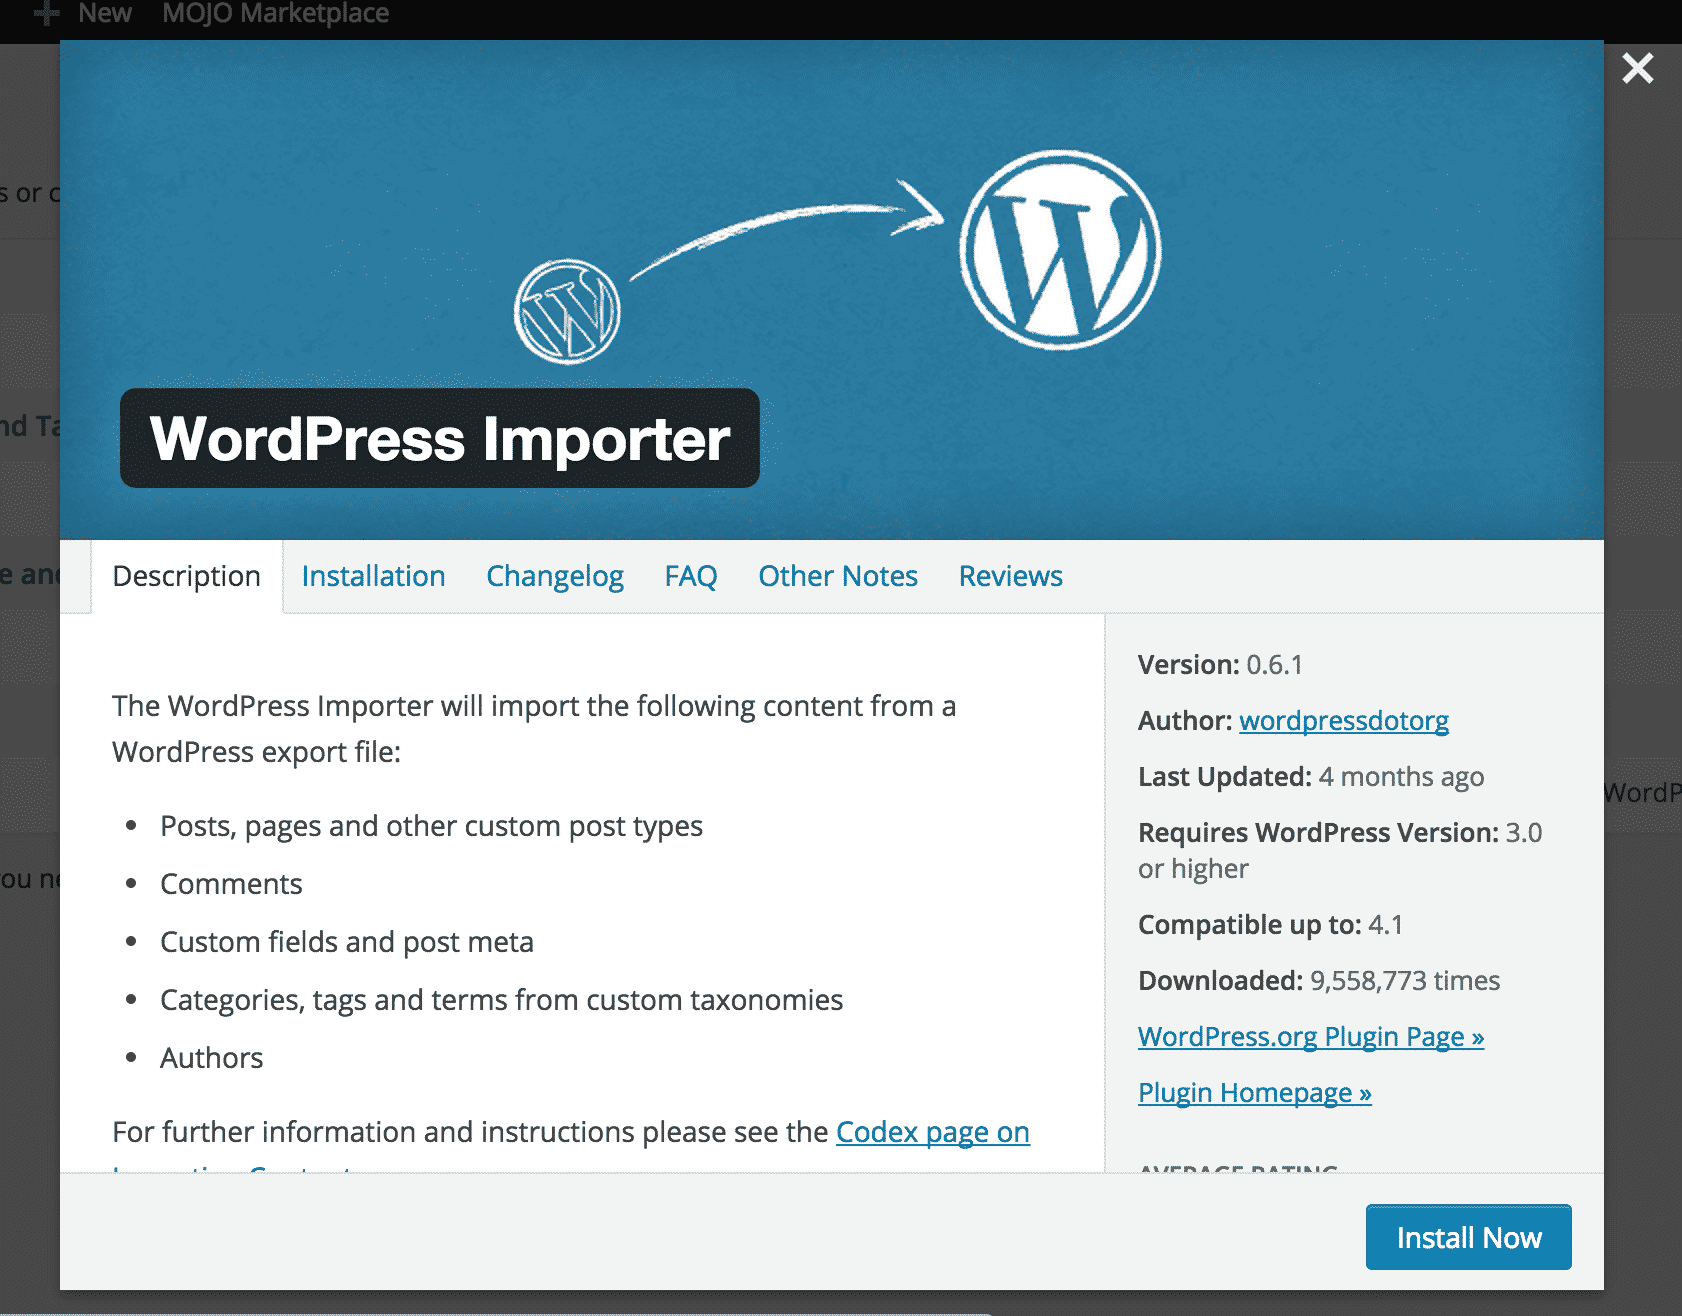
2. Import into WordPress. Click on Tools > Import, and then click on WordPress > Install Now to install the WordPress importer (which works for SquareSpace sites). Once installed, click “Activate and Run Importer”.
3. Find the .xml file you exported from SquareSpace and click “Upload File and Import”
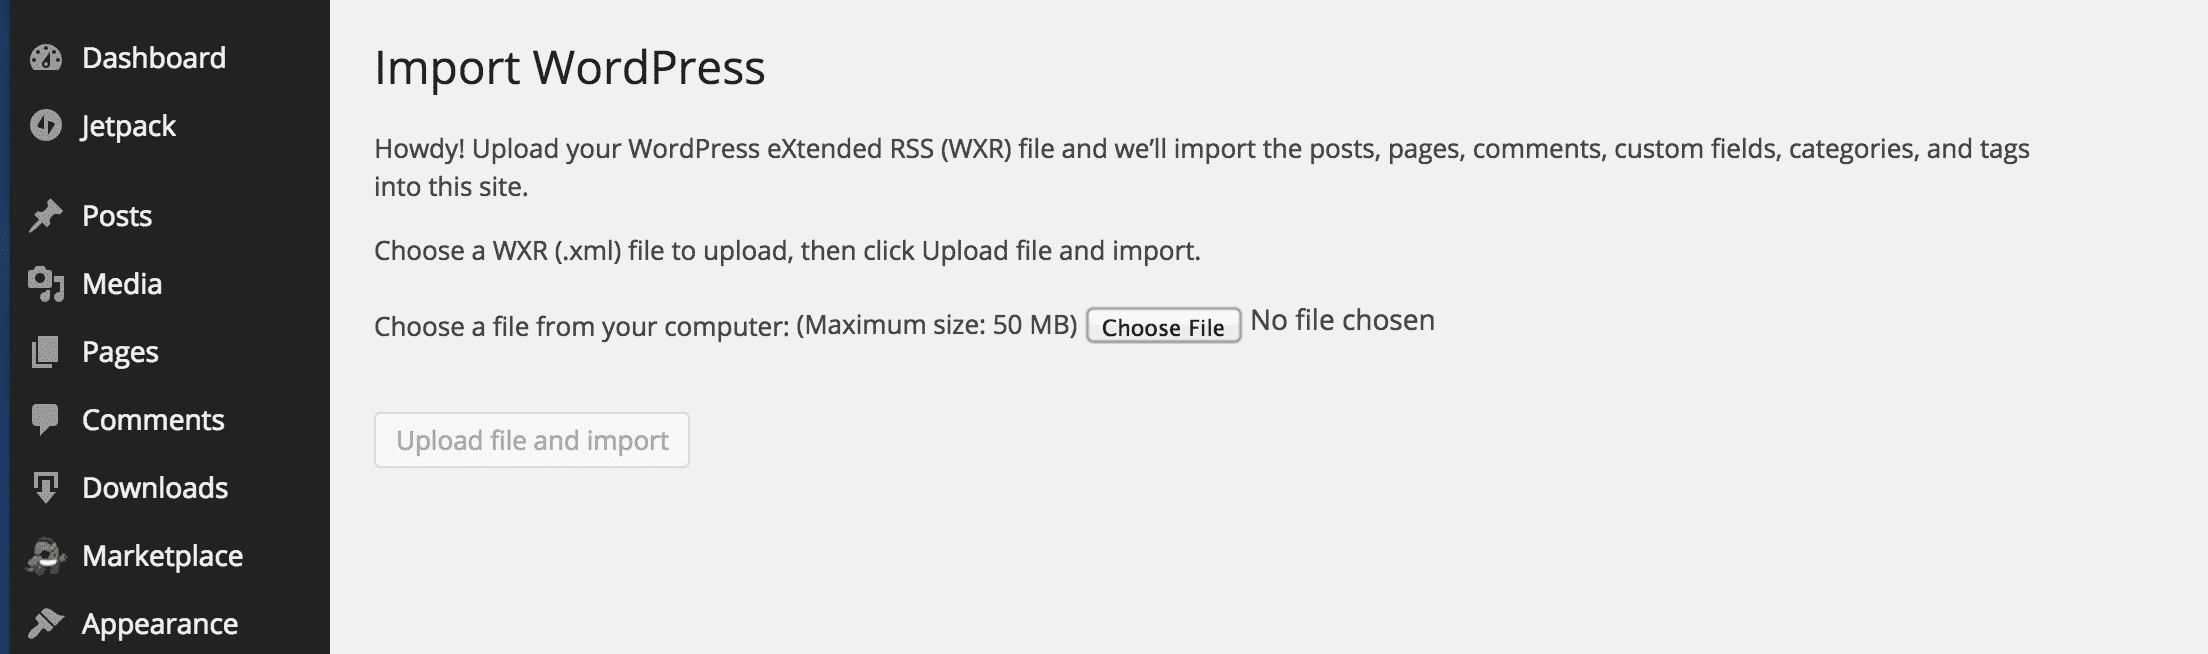
Be prepared to have some things look weird after you do the import. You'll have to review all your pages and posts and fix formatting, links, etc.
4. Bring all the other content over that SquareSpace won't export (anything other than the first blog page) using the steps 2, 3 and 4 of the Copy and Paste method outlined below.
Copy & Paste Strategy
If you choose to copy and paste your content, you can automate part of this process to make it go faster by creating all of your pages in bulk, and then copying and pasting your content over from Squarespace:
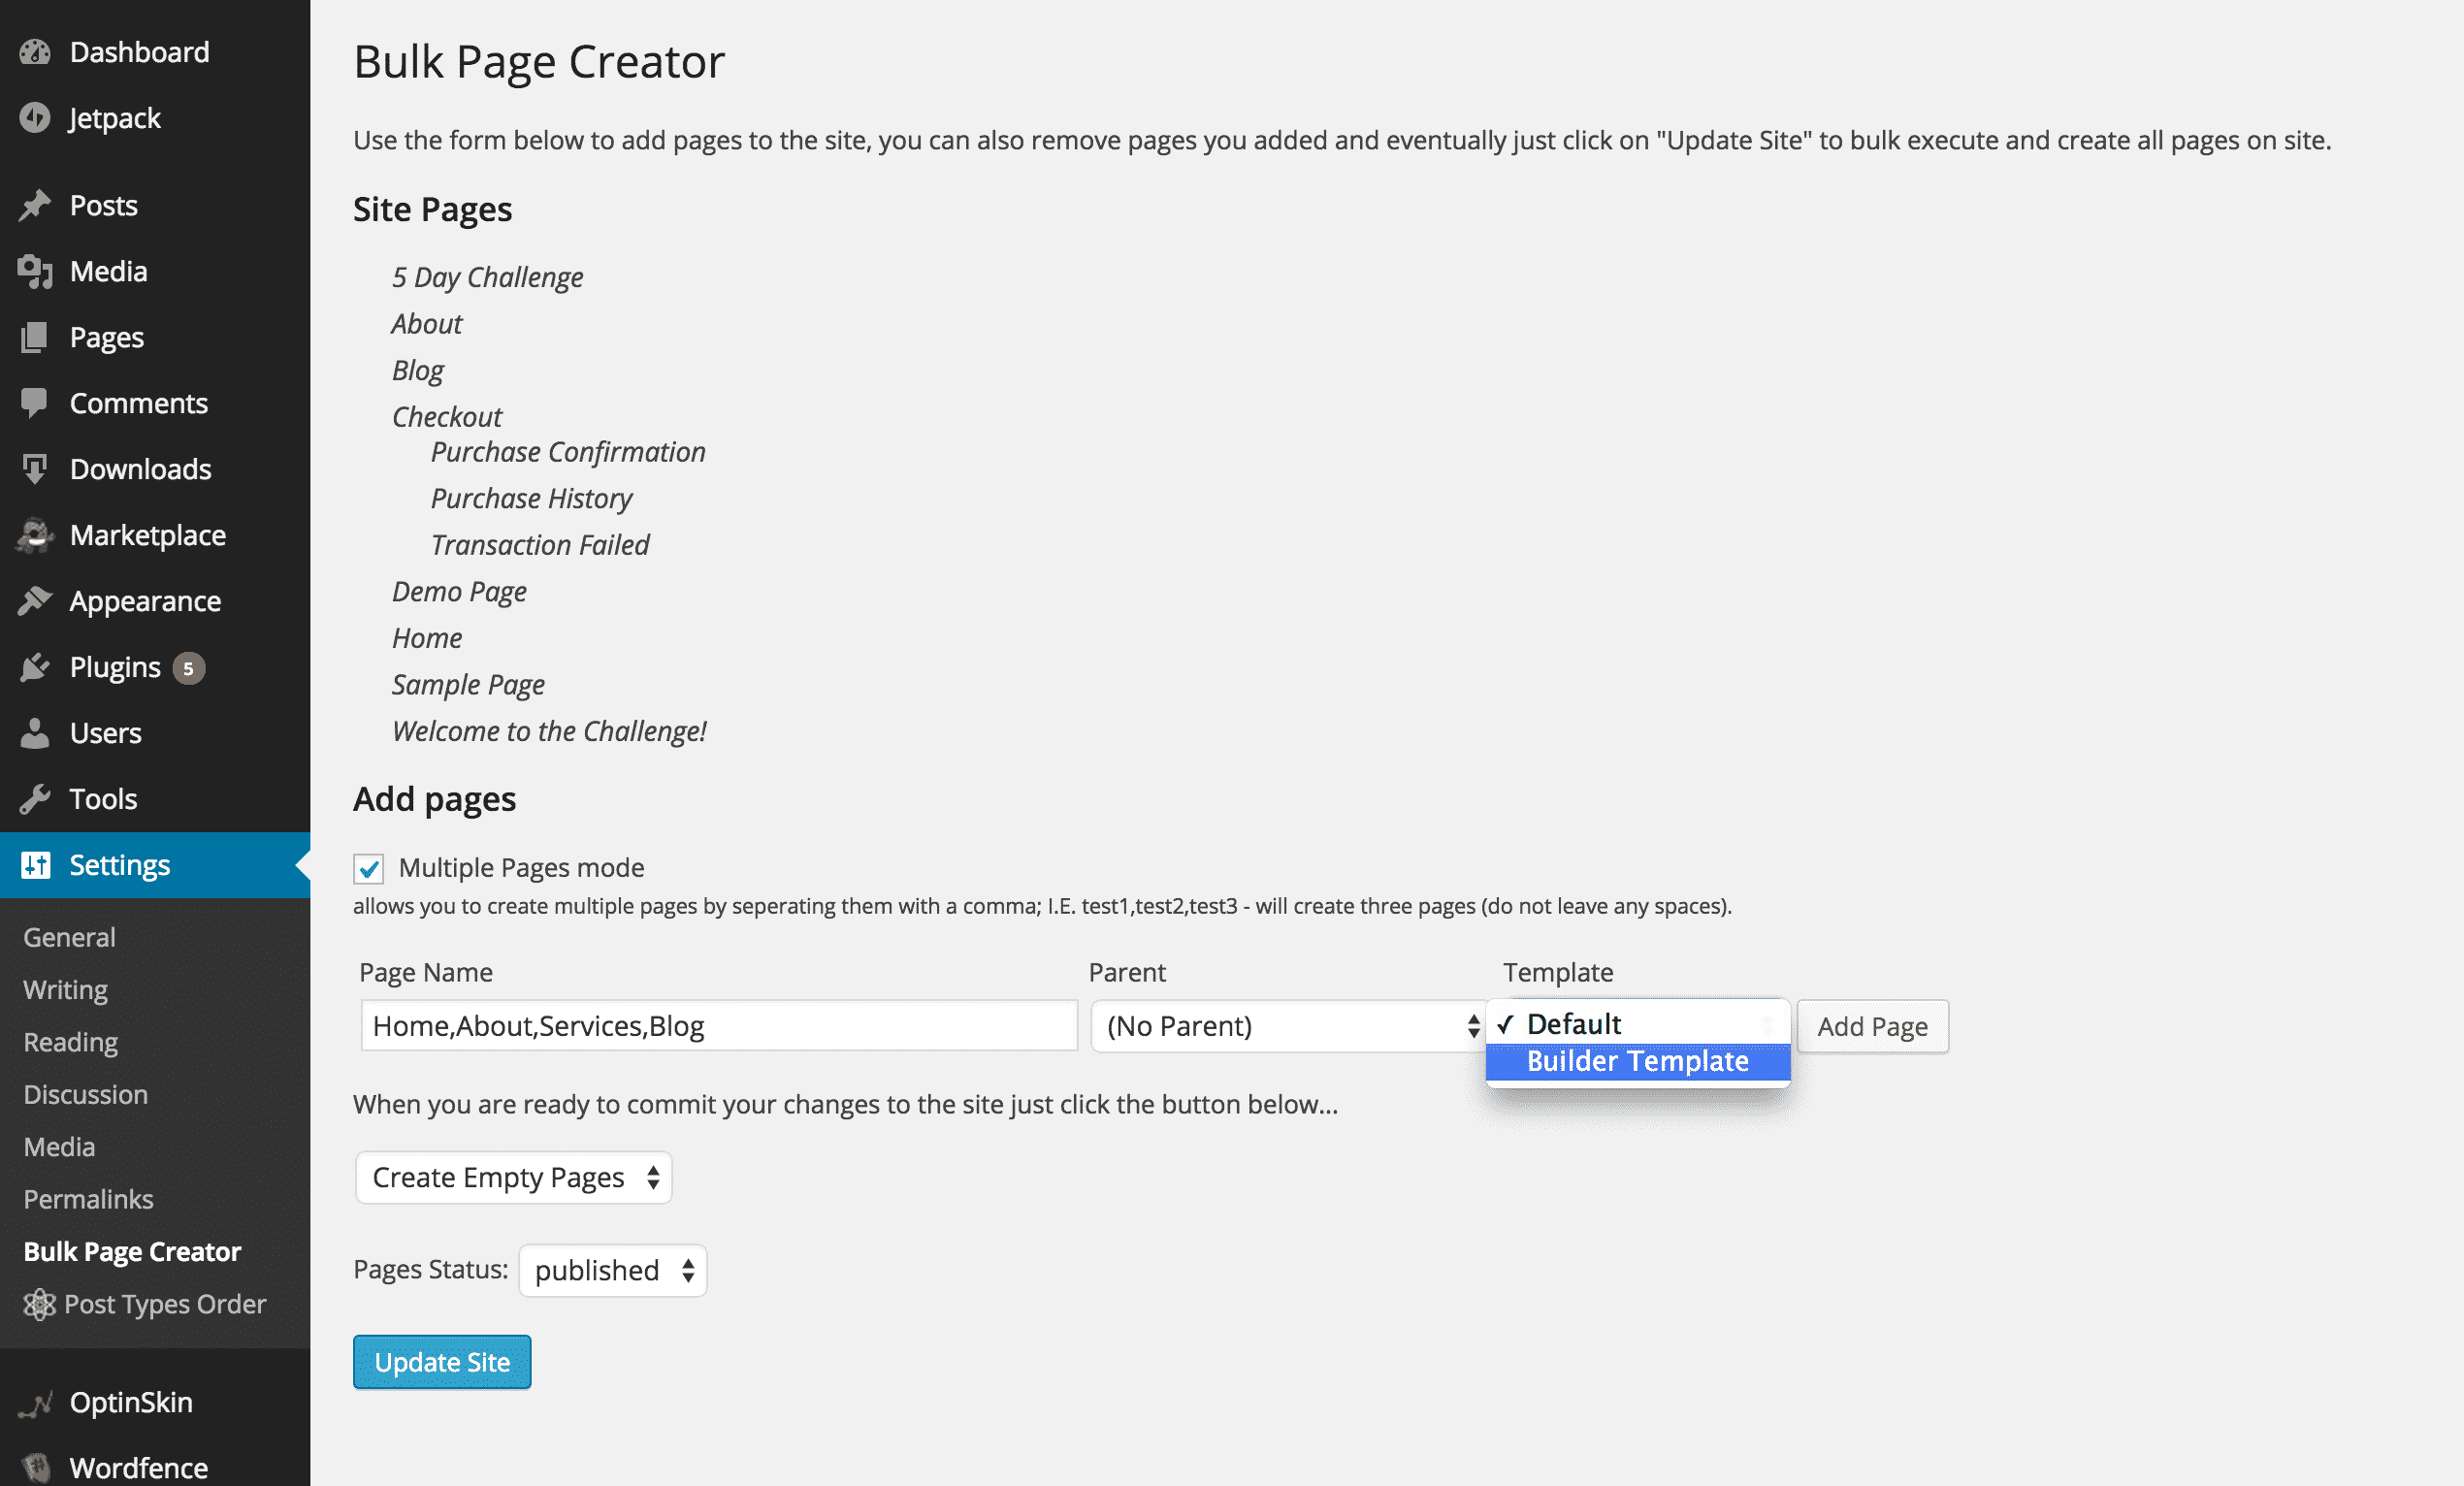
1. Install and activate the Bulk Page Creator plugin on your new WordPress site.
2. Click on Settings > Bulk Page Creator. Type the names of all your top-level pages separating them with commas (no spaces). Make sure you select “Builder Template” as the page template if you're using the Make Theme like I recommend in the Free 5 Day Website Challenge.
3. Click Add Page. Then if you have subpages (like say you have “Contact and History” under your About section) enter those page names, select About as the Parent and click Add Page.
4. When you have all your pages added, they'll show up in a list of Site Pages. Make sure they all look how you want and are in the right order.
5. Select “Create Empty Pages” and make the status “Published”.
6. Click Update Site. Presto! You just created all the pages for your site. (Note that this is only pages, not blog posts – we'll do that later).
7. Copy the text from your SquareSpace pages (highlight the text you're copying, and press Ctrl C (Command C on a Mac) to copy it. Then on your WordPress site, navigate to the page you're pasting the content to, click Edit Page, put your cursor in the text editor and press Ctrl V (or command V on a Mac) to paste the text.
4. Export your images from SquareSpace, import into WordPress
Download, install and activate the Import External Images plugin on your WordPress site. It's okay that this plugin hasn't been updated in awhile, it totally still works!
Once you have it installed, go to Media > Import Images and click “Save Changes” to start the import (it may have already run on install, you won't hurt anything to start it again).
This plugin will copy the images from your old site to your media library. Now instead of these images living on your Squarespace site and then being broken when we move the domain name in step 6, they live on your WordPres site and should load properly. You might need to re-add them in your pages and posts after you change the domain name, but you'll have them in WordPress to do it!
To bring an image over easily without using the plugin, go to your old SquareSpace site, right-click (or control click on a Mac) on the image on your old site, select Save Image As and save the image to a folder on your computer. Then in the WordPress page, put your cursor where you want the image to go, click the Add Media button and follow steps to upload the image.
5. Fix internal links
Say you copied over a SquareSpace page that linked to another SquareSpace page on your site from within the text. That link is going to point back to a page on your old SquareSpace site.
Since you already have your pages created, you'll want fix that link to point to a page on your WordPress site by putting your cursor on the link, clicking the Chain icon at the top of the text editor (insert/edit link) and then in the list of existing content, find the page you want to link to and click Save.
6. Point your domain name from SquareSpace to WordPress
Your last step is to finalize the move by pointing your old domain to your new site and changing your WordPress URL.
This is next-level shiz, people. If you look at these steps and you don't feel confident you can do this on your own, it's okay! Just contact Bluehost* and ask them to help you out.
But below are some tutorials you can follow.
First, we're going to point your Squarespace domain to another website – http://help.squarespace.com/guides/opening-dns-settings
- In the Home Menu, click Settings, and then click Domains.
2. Then click on Advanced Settings, and then on the Nameservers Tab.
3. Click on the “Use Custom Nameservers” button (not use SquareSpace nameservers).
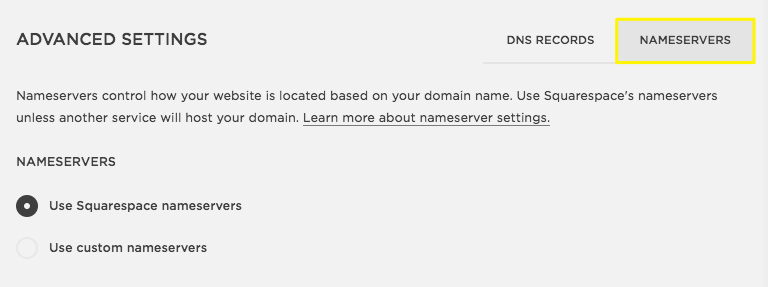
4. Change your Nameservers to Bluehost Nameservers if you're using Bluehost*. These are the nameservers to enter:
NS1.Bluehost.com
NS2.Bluehost.com
5. Change Your URL in WordPress: Follow this tutorial and Start at Step 2.
7. Pop a bottle of champagne!
This is a huge project, BFF!! But you can totally do it, and when you're done, definitely celebrate!!!
And if you know you need to move from SquareSpace to WordPress but you're just not feeling like doing all of this work, then check out my Done For You package and schedule a free consultation with me. My prices for moving from SquareSpace to WordPress are right on that page!
And be sure to join the Free 5 Day Website Challenge for step-by-step video training on how to build your WordPress site and get access to my Facebook group where I can give you advice and help you out!

*Some of the links on this page are affiliate links, which means I receive a commission when you make a purchase via my link. I only recommend products and services I’ve spent my own money on and love, and you pay the same (or less when I've negotiated a discounted rate for my referrals) whether you use my affiliate link or not, and the commissions I earn from your purchases help me to keep the 5 Day Website Challenge free. So thanks in advance for your support!